|
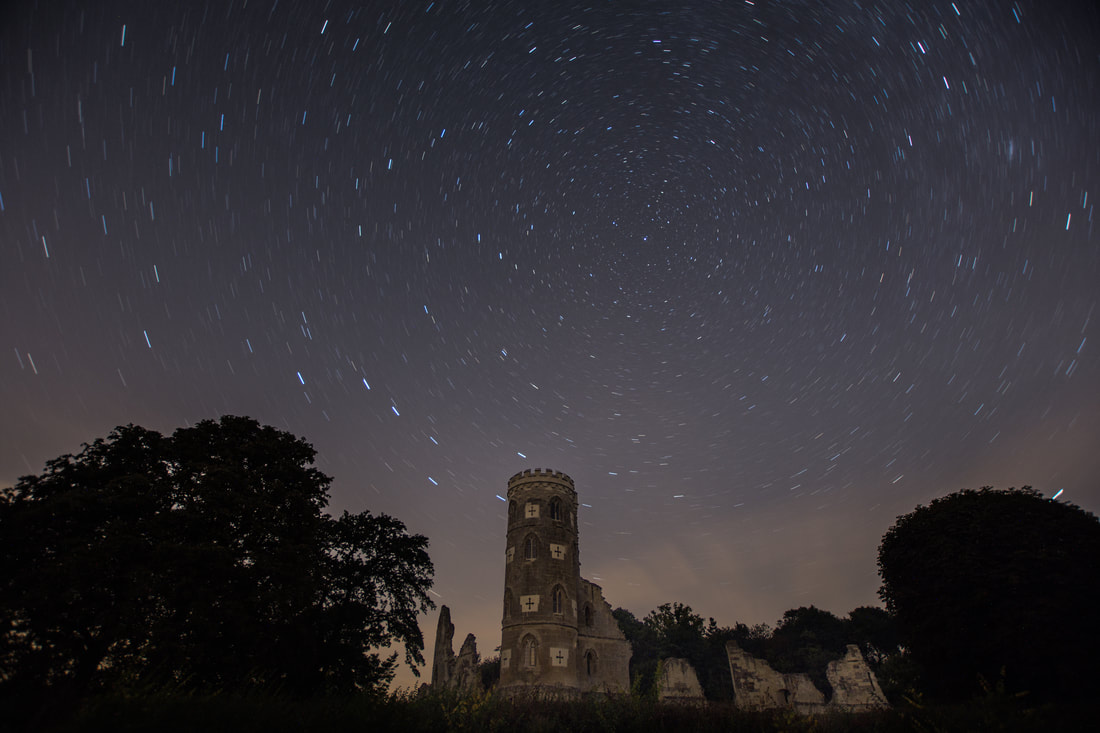
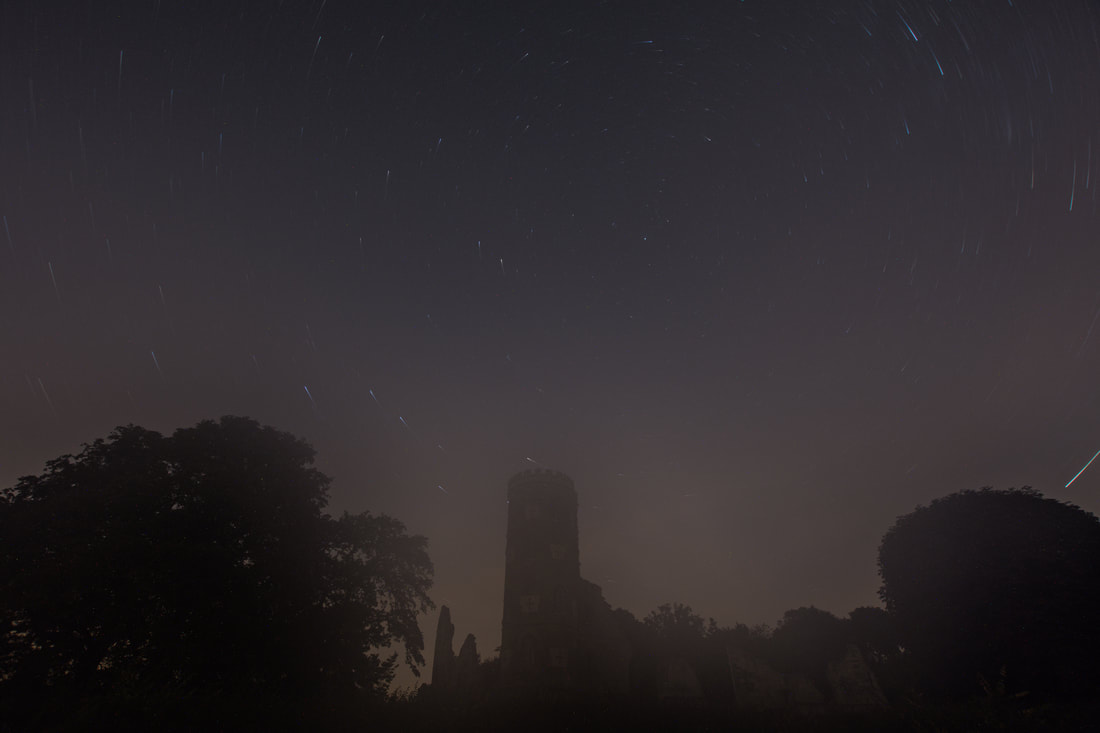
Astrophotography is an extremely exciting branch of photography, yet very complicated as it depends on numerous factors. Unlike conventional landscape photographers, who often seek for cloudy and moody skies, astrophotographers aim at working in clear skies (for obvious reasons), a condition not common here in the UK. Also, it is highly desirable to look for a location with little light pollution to maximise the brightness of the stars. For the same reason, a thin or no moon is recommended when shooting at night, thus reducing the chances of going out only to a few nights a month. Finally, it is also important to consider that although the main subject will be the sky, including an interesting foreground is vital for an attractive night photograph. Although I do not pretend to be even called a “photographer” I managed to find out that the combination of all these requirements make astrophotography quite challenging. Although I must admit that I have gone out at night only on two occasions (each with a completely different outcome) the purpose of this post is to give some recommendations for those who would like to have a go at astrophotography for the very first time. In contrast to the numerous atmospheric requirements, very few pieces of gear are essential to get yourself introduced into astrophotography, being the tripod possibly the only absolutely crucial item (and as always, the sturdier the better). Almost any modern DSLR, with a respectable quality at high ISO can do a good job. A wide(-ish) angle lens is generally preferred, although anything up to 35-50mm can be used, as long as it is sufficiently luminous. Finally, you will probably also need a cable release (recommended, but it not be essential unless you want to use exposures longer than 30 s). Therefore, anyone can get started in astrophotography without having to spend a fortune on gear! Something that I do find absolutely essential is company, which is free in most occasions. It usually just takes a few nice words… well, maybe a few nice beers or biscuits… well, maybe beers AND biscuits… or beers, biscuits and more than a few nice words (basically, you will need to tell a big fat lie to a friend, who is never going to forget you for taking him out in the middle of the night just to eat biscuits in a field in the middle of nowhere. And he will be lucky if he gets a beer!). I must be honest, I would literally soil my pants if I had to go out on my own in the complete darkness. Actually, I must admit that I tried it once in Cornwall, and I thanked all gods for making the sky very very cloudy, hence completely impracticable for a night photography session. Oh well! Maybe it was not that so very very cloudy, but at the time I thought it was... Once you have your gear ready and your companion tricked, you will have to make sure that you plan your session very meticulously beforehand. Have a good look at the local weather forecast, aiming at clear skies, but paying also attention to temperature and humidity conditions (more on this below). Check the lunar calendar and make sure that your location is in a relatively dark area free of light pollution. There are many tools and applications on the internet to check each of those conditions, and their combination can be very valuable. There are also many tutorials out there that can be of great help. Photopills is definitely a great app to use both when planning earlier at home and on the spot, with multitude of great tools to facilitate the experience (tutorials, videos, planner, augmented reality, exposure calculator, etc). I have recently found out how lucky I was on my first occasion out on a night photography session. The folly at Wimpole estate seemed to us a very interesting subject and we had previously scouted the location in anticipation, making sure that the access was possible and safe during the night (although we did nevertheless get lost for a few minutes on that night). The weather conditions were great, with completely clear skies and quite a warm temperature, with no moon at all. The sky was a truly wonderful display, which brought me back such fond memories of my childhood spending most summer nights on my grandad’s lap, observing “Sa Carrera de Sant Jaume” (Milky Way). In the end, everything worked quite well on that first night: we arrived, we got our nice shots and went back home safe and sound (after getting a little lost on the way back to the car). Our second night photography session was a completely different story. Everything went well at the beginning, I got a decent 8 min startrail test shot, in preparation for a much longer ones to follow. After the initial test shot, I dropped the aperture to f/6.3 in order to achieve a 25 min startrail shot. I pressed the shutter. It is amazing how fast 25 min go when you are excited trying to guess how wonderful this new shot will come out. However, to my great disappointment, when I looked at the back of my camera I realised that something had gone wrong this time. The image appeared completely foggy but I did not completely understand why at the beginning. I panicked a bit, thinking that maybe there was some condensation inside the lens or even inside the camera body, but I quickly realised that I was suffering from condensation at the front element of my lens. My new friend, the dew, had made a stellar appearance! I wiped my lens with a lens cloth and tried to take a few more shots, just to notice how rapidly the condensation was accumulating again and again in long shots (>1 min). I then decided to use the interval timer of my camera to set up a time-lapse of many short (30 s) shots, with a 10 s break in between, which I used to wipe my lens. Even doing so, the results were very upsetting, as condensation appeared in very quickly and ruined several of those shots. More annoyingly, I manage to notice (only at the very end of the run) that the time-lapse had been a complete failure because I had been pushing the lens in while trying to wipe it out, and so causing the change of the focal length during the series. After that, tired and sleepy, but mainly frustrated, I decided to pack my stuff and not to shoot any more images that night. Very reluctantly, I had a look at the pictures the next morning, just to make my frustration grow even worse. A quick search over the internet helped me realise how common this problem is among the astronomy and astrophotography community. Indeed, it all makes perfect sense now that I gave it a thought for more than 2 minutes… It is all down to the so-called “dew point”, which is the temperature below which water vapour in the air starts condensing in the form of liquid water. Therefore, at very high levels of humidity, water will start forming condensation droplets onto any surface that is slightly colder than the air’s dew point temperature. At 100% humidity, the dew point is the same as the air’s temperature!
Apparently, there are several possible solutions to this problem, some of which seem much simpler than others. At this point, I think that a lens hood and disposable hand warmers wrapped around the lens seem like the most attainable combination for the next night out. Also, I plan to do some more reading on the subject in order to get better prepared. Among the many tutorials out there, I strongly recommend the one written by Antoni Cladera, one of the creators of Photopills. Although I am a complete ignorant on astrophotography, I somehow feel that I am entitled to give these little pieces of advice, just because I have experienced some of the problems. As you can imagine, I was very disappointed when I came back home after my second (only!) night photography session, but I am now very thankful that things went this way. I am a firm believer that we learn more out of our mistakes, rather than we do out of our successes. Of course, mistakes can never be accounted. And I think this applies to every aspect in life… For a life with plenty of mistakes!
1 Comment
|
Archives
September 2017
Categories |


 RSS Feed